An open air test bench will be a handy tool if you have to change your hardware very frequently for some reasons (engineers, PC overclockers, etc) or you just want to show off your computer’s component to everyone. A test bench allows you to have direct access to the PC, speeding up your working processes.
This time, I will review the Cooler Master Test Bench Lab V1.0. Cooler Master released this test bench in 2009. It is pretty hard to get hands on one now because of the 8 years long sales period. Not many stores have the test bench available on stock, leading to a much higher price. You may need to pay more for ordering and shipping from other countries. Keep that in mind if you want to get one.
Unboxing
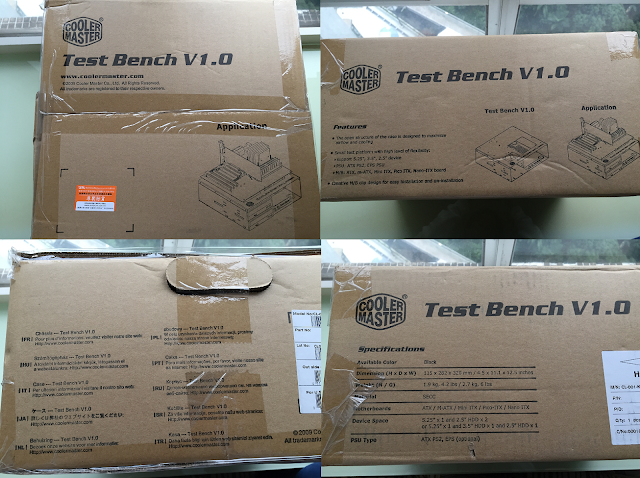
The test bench is shipped inside a big brown cardboard box. There is a specifications list on the side, indicating the compatible motherboard sizes, power supply standards and the drive options. On the other side, there are pictures showing the test bench itself and the look after installing everything on it.
After opening the box, the Cooler Master Test Bench V1.0 is neatly and safely packed inside with soft foam at each corner. There are not much accessories given out of the box. There is no user manual and warranty card. All the necessary screws and standoffs are included in one plastic zipper bag.
There are total 4 types of screws and standoffs.
- 8 6-32 UNC screws for mounting the power supply
- About 20 M3 screws for mounting everything, like HDD, SSD and the standoffs.
- 9 plastic motherboard standoffs for tool-less mounting/li>
- 4 metal motherboard standoffs
It is appreciated that Cooler Master has included more than enough screws in the bag, but why only 4 metal standoffs? 9 standoffs are needed for a full-sized ATX motherboard. This limits the option for people to secure their motherboards using screws only.
Review
Design
The Cooler Master Test Bench V1.0 is made out of black coated sheet steel (SECC), which feels pretty rigid and strong. It does flex a little bit above the power supply mount when pressing down on the frame, due to lack of vertical support at that point. However, this does not affect the overall building experience at all.
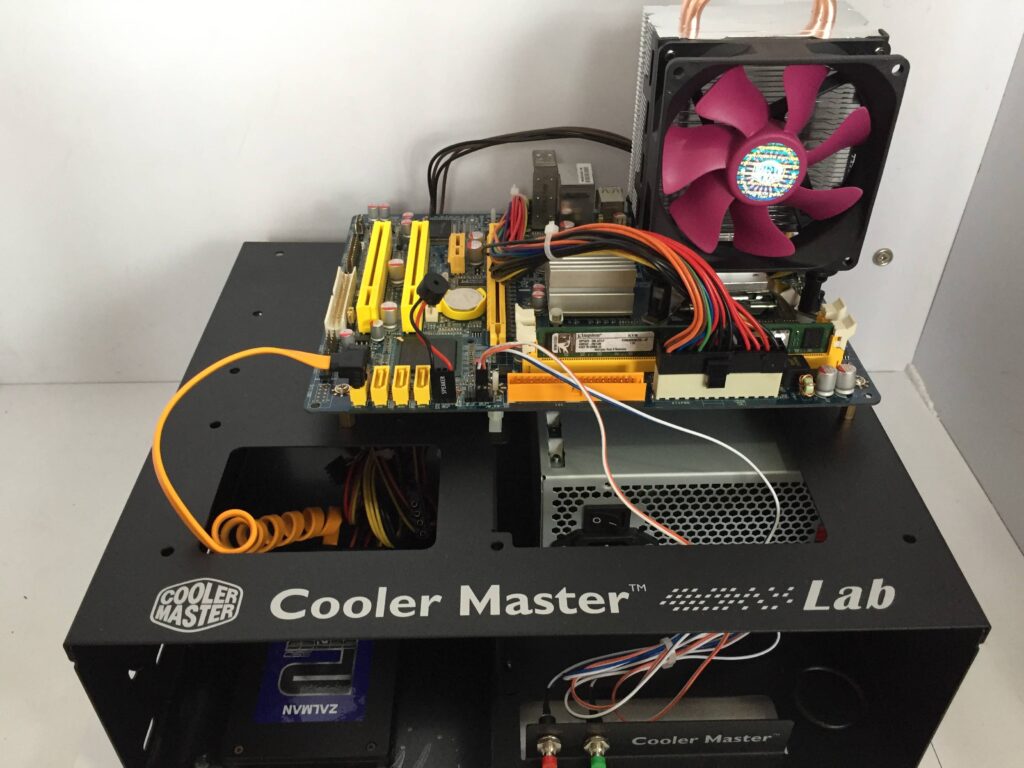
The test bench has a very minimalistic design style with appropriate cutouts for cable management, motherboard backplate installation. With large circle cutout and high anti-vibration rubber feet on all four corners, ample ventilation is provided for the power supply. There are only the “Cooler Master Lab” logos on the chassis, which is not exactly the product name. It is a little confusing.
The Cooler Master Test Bench V1.0 support ATX, m-ATX, Mini-ITX, Pico-ITX, Nano-ITX motherboard. It is very efficient in the use of space. The whole chassis is slightly larger than a full-sized ATX motherboard, with only the mountings for necessary parts to run a system.
An on/off switch and a reset switch are included, which not every motherboards on the market have their own power buttons on the board itself.
The test bench has reasonable drives mounting options. It supports one 5.25 inch, one 3.5 inch, and one 2.5 inch drives. Or one 5.25 inch and two 2.5 inch drives. It provides a lot of flexibility while packing them into a compact chassis. Although it does not have much drives expandability, large storage capacity is not required for test bench. It is not designed to use like a workstation or server.
Mounting Methods and Options
Motherboard
For the Cooler Master Test Bench V1.0, you can use either the plastic or metal standoffs to mount the motherboard, but only 4 metal standoffs are included.
The plastic standoffs are in fact very convenient if you have to swap motherboard often. The standoffs are tool-less, so you can just press the board in place. They can hold the motherboard with no problem. You can pick up the whole test bench by grabbing the motherboard with the plastic standoffs. (NOT recommend)
However, the plastic standoffs are not in very high quality. Its plastic does not feel very strong and can easily break. A thicker base at the bottom of the standoffs can solve this small issue. Or simply provide a few extra standoffs in the box, in case they break.
PCIe Expansion Slots
The Cooler Master Test Bench V1.0 does not have the support for expansion cards. The installed card will wobble, which makes you harder to firmly plug the cables without holding the card itself. This may cause bigger problem if you are installing a large, full-length graphics card. You need to be careful not to put too much stress on the card when working on the machine.
To install any drives, you need to use the standard M3 screws. No tool-less mounting solution is provided. For most of the time, the mounting process is normal and does not have any special problems. However, if you are mounting drives to the bottom like I did in the above photo, it is hard to get the screws in the bottom of the chassis. Also, there are no anti-vibration rubber grommets if you opt to use mechanical hard drives.
Cooling
If you want to have extra cooling for your motherboard components (VRM, Ram, etc.) or multiple graphics cards, you would be disappointed. The Cooler Master Test Bench V1.0 does not have any extra fan, all-in-one liquid cooler and radiator mounts. In my opinion, at least one fan mount should be included. The mount can be implemented as a flexible arm for fans and small AIO coolers, like what the Dimastech do to their test benches. It will allow users to choose to cool any specific areas on the motherboard.
Power Supply
The power supply is firmly secured by three 6-32 UNC screws. The power supply sits flat to the chassis. However, I think the power supply mount should be reversed. The distance of the 24-pin connector and the cables of the PSU is too great. If your 24-pin cable is not long enough, you will have to route the cable over the motherboard, like I did. This problem will be worsen if you have a wider ATX motherboard. Though, you can route the cables underneath the motherboard to reach connectors at further distance.
Apart from that, the current power supply mounting makes the power cable comes out in the front, where the power and reset switches sit, opposite to the I/O ports of the motherboard. This makes there are cables sticking out in different directions, which is not good for tidy cable management.
User Experience
In my test bench, the cables of the on/off switch and reset switch are not connected correctly. The power switch cables are connected to the reset switch plug, while reset switch cables are connected to the power switch plug. This is not a big deal, but it costs me time to figure out what happened.
It is easy to install all the PC components and get everything working. The chassis is made out of high quality steel and feels very rigid. It would be a welcome change to include a quick start guide or user manual in the package. There is no user manual even on the Cooler Master product page. It would not be a problem for experience users, but it is still nice to have one.
Conclusion

The Cooler Master Test Bench V1.0 provides an acceptable platform for users to work on their PC hardware with ease. The test bench is in great build quality with some accessories requiring tighter quality control.
A Cooler Master Test Bench V1.1/2.0 would be a great product to improve the user experience based on the existing one.
- Higher quality tool-less standoffs. Use metal as material will be the best.
- Add tool-less mounting solutions for drives.
- Better cable management solution. A more reasonable placement of the power supply will be helpful. A slightly bigger frame to accommodate the cutout for full-sized ATX motherboard, as the existing cutout will be blocked by the board itself.
- Add support to PCIe expansion cards for a more secure mounting.
- Add a flexible arm for extra cooling capability. It will be more versatile if AIO coolers and radiators can be fitted.
For more information about the test bench, you can visit Cooler Master website.
Feel free to leave comments below, if you have any opinion about this website. Share the website around if you enjoy reading it. Subscribe to our Newsletter or follow our Google+, Facebook and Twitter.
Support this website simply by shopping in Amazon. It will give us small kickbacks, if you use the above affiliate links to make any purchases, which will help us grow.


